Tag Archive | eye makeup

The Best Foundation Brush and the Secret to Getting it Super Clean!

Foundation 2Today’s blog post is two- fold, the first part is about my favorite makeup brush and with that I can’t help mentioning my awesome foundation I use with it. The second part is about the super exciting way to clean said brush (it’s the little things in life, right?).

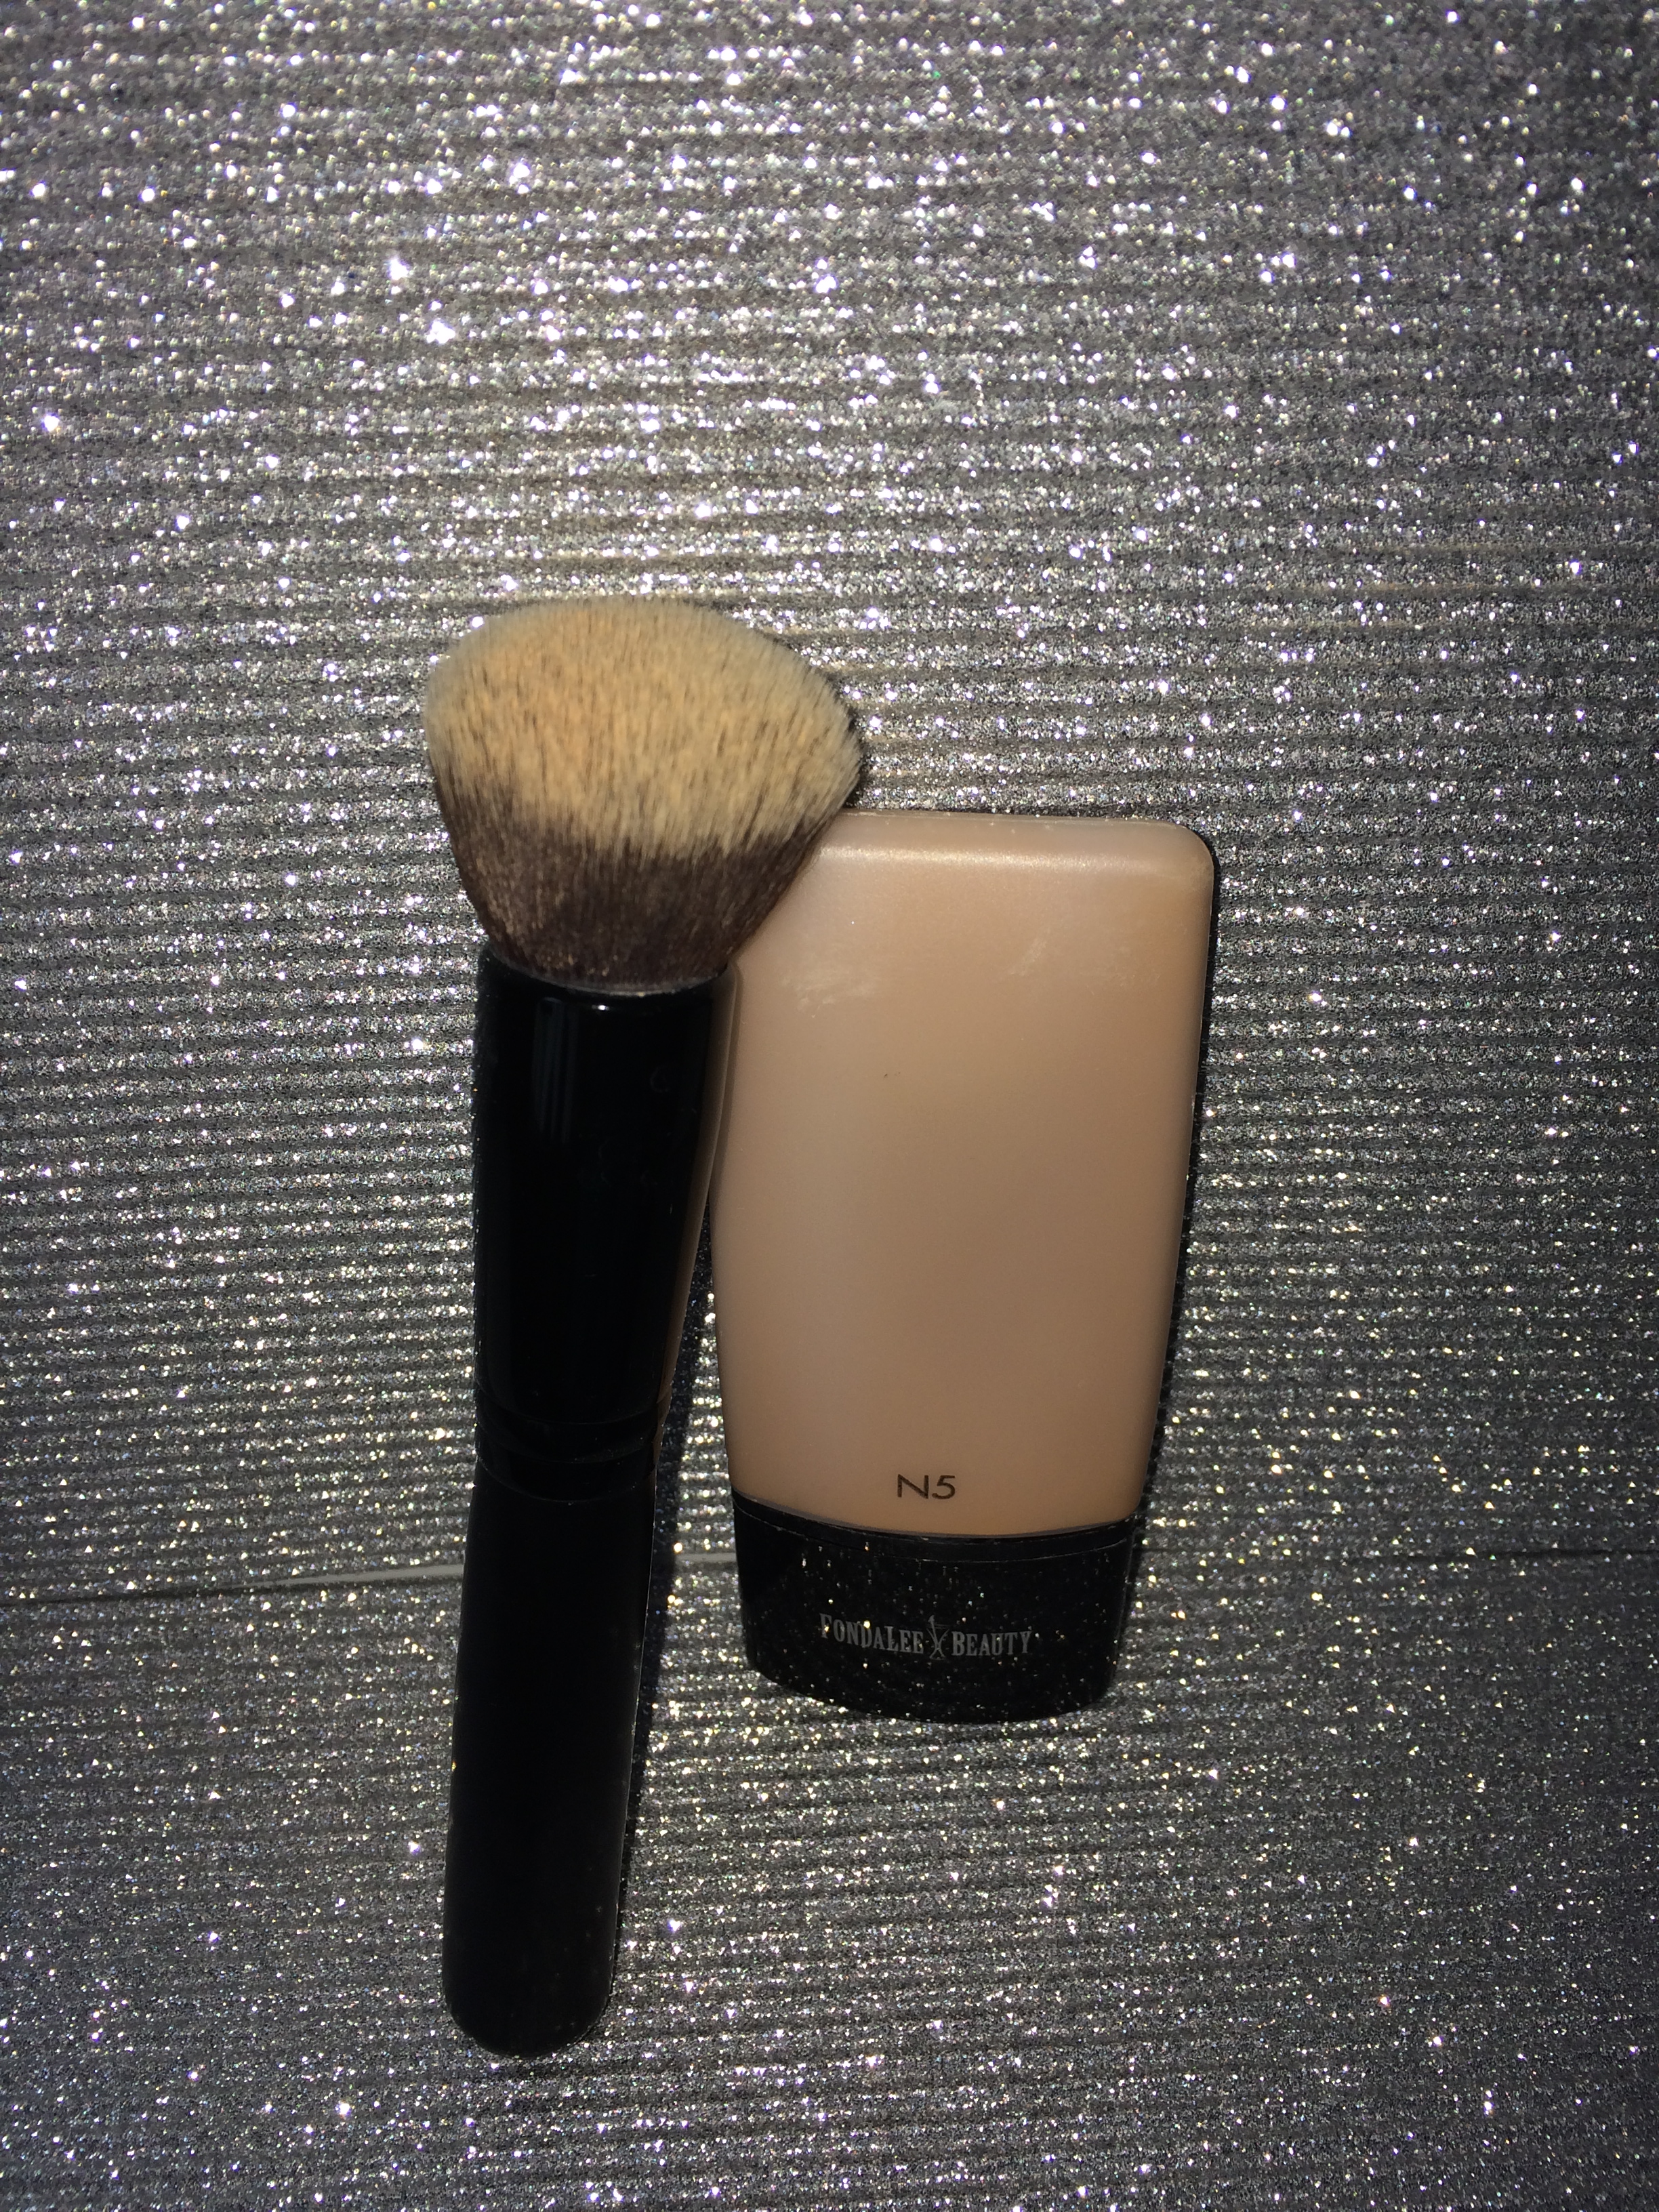
So, about 5-6 months ago I went to see the Fabulous Fonda Lee at the Fonda Lee Beauty Bar. I explained to her that I didn’t like heavy face makeup and that I used a mineral powder makeup. Well, Fonda Lee tried this mousse foundation ($55) which I loved, but the brush was amazing ($50ish)!!!! I had to have it! So, this foundation brush made my face look like it was airbrushed! It was fantastic! It will totally change your life! Literally other people I know have gone on their own, also with my encouragement, and gotten this brush and they completely agree! The foundation is amazing also, but you could use any foundation you are attached to with it, but the mousse is definitely worth trying, it goes on like butter! Again, I know several other people who rave about it.

So, I’ve been using it almost every single day, I have used it with other foundation products also. So, I had some built up makeup in it over the weekend (I think from the other “darker, for when I have a tan” foundation I have been using). I was running my finger nails through the brush and it was getting stuck under my nails (gross!). I couldn’t get it all cleaned out. Until….I used OLIVE OIL to clean it. Only a little bit, but I was amazed! A lot of the staining I had in my brush were even washed out I was so happy and excited (like I said it’s the little things)!

So here’s what I did. I put a small amount of olive oil in the palm of my hand and swirled the brush around in it, as I would if I was putting foundation on my face. I made sure to get it in between the hairs to get all of the product out. I then cleaned my brush again with antibacterial soft soap. My brush is brand new again!!!! It’s the best brush cleaning trick ever! Definitely try it on your brushes if you have any gunked up ones you need to clean.

If you’re interested in this awesome foundation brush and want a flawless look, not like those paintbrush looking foundation brushes (yuck!). There’s even a new slanted version to get under and around your eyes better (I wish I had that one). Get in touch with Fonda Lee by visiting her at the Fonda Lee Beauty Bar in Mid Town in Palm Beach Gardens, FL or if you aren’t local contact her via her website at http://fondaleebeauty.com/. Be sure to check out the smooth and flawless mousse while you are at it.

Who Doesn’t Love A Good Highlight?

highlighter tube 2You know the difference between having your makeup done by a professional and doing it yourself? The highlighting and contouring! It seems like everywhere I look recently there’s someone showing you how to use different color foundations or concealers to paint your face up to contour it. The people in the pictures look crazy, and I don’t know about you, but it looks a little bit difficult to master at home on your own.

Now, in studying makeup artistry, I have learned how to do the crazy looking concealer contouring too, or as my friends like to call it my clown makeup. I do it when I have somewhere important to go, or if I’m having photos taken, and I definitely do it when I am doing someone else’s makeup for photos or events. However, for everyday life and work I don’t need, nor do I have time to do all the crazy concealer contouring tricks.

But I do have one that I do even for my natural look that just gives you that little extra glow. I use a little bit of highlighter above my eye and along my upper cheek bone and it makes a big difference.

I have tons of makeup, I mean it’s out of hand, so when I was looking through my Sephora Birthday gift I found a great Benefit highlighter that came in a tube like a lipstick, and it was a gold color. I like it especially because it was free, but I think a pink tone is better for this highlight. So, I went looking and found a fabulously-affordable dupe for Benefit High Beams ($26) in ELF Cosmetic’s Shimmering Facial Whip in Lilac Petal. Ready for this…it costs $1! Does it get any better than that?

You only need a small pearl sized amount each time for both eyes. I make three dots; one in the middle above the eye, one right beside the eye, and one below in the center of your eye on top of your cheek bone and then I rub them together in a “C” shape until it fades to perfect glow. (See pics below)

You have the perfect easy highlight for on the go that will make you glow. This trick will make you instantly look and feel better. Buh-Bye tired looking eyes. Slap on the face make up, your 3D mascara, this highlighter, and some lip gloss and you will look amaze-balls on the go in less than 5 minutes flat. No one will ever know you’re a crazy busy, tired, mom on the go!

highlighter dots 2highlighter 1highlighter blended

Get your Essential Shimmering Facial Whip here: http://www.eyeslipsface.com/elf/face/shimmer/shimmering_facial_whip


The Longest Lashes Ever With Mascara! No Falsies Needed!

My all natural eyelashes and my lashes with 3D mascara!

My all natural eyelashes and my lashes with 3D mascara!

So you might be wondering what you are going to do until your own lashes reach epic length. I found the perfect mascara to make it look like you have eye lash extensions; you get the length and fullness of false lashes without the obviously fake look. It’s by a brand new natural company called Younique and they have awesome 3D Fiber mascara. It goes on in 3 easy steps, gel, fiber, gel and it washes off easily with soap and water. You can repeat the various steps to make your lashes as long as you want, one coat for a quick trip to the grocery store, or 3 coats for a night out on the town.
My lashes are naturally longer plus I use the Grande Lash MD, and then the 3D mascara to create outrageous lashes! Not only do they look longer, but they look fuller too! People stop me on the street constantly to ask me about my lashes and always think I have extensions. Even my mom asked me if I was wearing false lashes the other day, but no, they are all mine!!!!
I was so impressed with the mascara and other makeup because of their natural ingredients that I decided to get involved. I figured I was selling so much walking down the street, that it made sense for me to benefit when others bought this amazing mascara.
Since I placed my order and having been using the 3D mascara, they came out with a new formula that is even better. The one coat of the new formula is equivalent to three coats of the old formula! I put up a picture of my natural lashes and then my lashes on “lash crack” with the old 3D mascara and the other picture shows one eye with the old formula and one eye with the new formula. It’s unbelievable.

Left side is the old formula and the right side is the new!!!! All orders from this blog will get the new formula!

Left side is the old formula and the right side is the new!!!! All orders from this blog will get the new formula!

If you want to get your own 3D mascara you can buy it through my Younique Independent Presenter website at https://www.youniqueproducts.com/fancypantsbeauty. Since I am an Independent Presenter for the company I have decided to host a show especially for my blog readers. I’m also going to have a raffle for a lip gloss or pigment of your choice for blog readers who make purchases during this party. I’ll choose a winner before midnight on April 11th, 2014 and the winner will get their chose of lip gloss color. To purchase from the party, please make sure you shop from the link below.


Get ready to have lashes like Bambi, I can assure you that you won’t want to miss out on getting your own 3D Fiber Mascara!
Shop the party now  https://www.youniqueproducts.com/fancypantsbeauty/party/121444/view

My model has regular mascara on the left side and one coat of the old formula on the right side. When I use a demo mascara with disposable wands you don't get the full results, but you can definitely see the difference!

My model has regular mascara on the left side and one coat of the old formula on the right side. When I use a demo mascara with disposable wands you don’t get the full results, but you can definitely see the difference!

3D in case


Perm and Dye…Your Lashes!

cropped perm and dyeHere’s a great way to look fabulous from the moment you wake up… perming and dying your lashes. I know it sounds crazy, but it is amazing. Just because I did this does not mean I don’t still wear mascara! It makes it look even better because my lashes now stay curled all the time!

You know those people at the gym, pool, and beach with the mascara streaking down there face? You so don’t want to be that girl, do you? Well, dying your lashes eliminates this problem, sometimes you just want to run out of your house and not worry about putting anything on. I love having my lashes permed and dyed for this reason, I wake up looking refreshed and put together.

cropped perm and dye 3My lashes tend to be a little unruly and clumpy (see picture from previous post) and perming them keeps them separated and untangled. It also gives them a nice natural curl without an eyelash curler. I personally quit using my eyelash curler after the second time it cut my lashes in half (fool me once…). So now I can have them curled all the time and dark without having to do any work. It looks like I have mascara on, but I don’t and no streaking when I get out of the pool. It’s fantastic.

It takes about an hour and a half to have the full service done, but for a busy mom you definitely get that time back and then some when you can rush out the door to 9:30am music class without doing anything and you don’t look like a total disaster. I of course always put my 3D mascara (learn more about this in my next post ) on if I have other eye makeup on to make my lashes really pop, or if I know I’ll be out in the land of the living all day long. The dye last about 4-6 weeks and that portion of the service only takes about 15 minutes. The perm last until your lashes fall out or about 2 months or so. If you have both services done is will probably cost about $105 depending on where you go, and dying your lashes costs about $20-35. It is cropped perm and dye 4much easier to find someone to tint your lashes than to perm them. I only know one person locally who provides this service.

I definitely recommend this service after growing your natural lashes out with the Grande Lash MD. It is the greatest time saver for the busy mom on the go! It also makes a huge difference in the way you feel especially when you are tired or feeling like you don’t have the time to primp like you used to.

If you live in Sunny South Florida, call and make an appointment with Joyce at Dr. Koger’s office in Jupiter 561- 748-1565. She will get you all set up and looking amazing in just an hour and a half! She is awesome at what she does!

It’s a LASH-travaganza!

cropped grande lash 2I am obsessed with eyelashes! I think having fabulous eyelashes can make the difference between drab and fab! Needless to say I am constantly searching for ways to make mine longer, dark, more dramatic, curlier, and all together absolutely fabulous!

After my son was born I had to attend a wedding three weeks later. I had what I thought was a great idea to get group eyelash extension to help me look less tired and better all around. BIG MISTAKE!!! The first problem was that they were wayyyy over board and I looked crazy at 9:00am. The second problem was that the woman used surgical glue, so some of the extensions fell out, and some of them stayed on and I couldn’t get them off. I looked even crazier as they began to fall out. The third problem was that my natural eyelashes broke off and I had little nubs for eyelashes left.

cropped grande lashI had individual eyelash extensions when I got married. Also several problems, 1) I don’t know about you, but it was incredible unnerving for me to sit for over two hours perfectly still with my eyes shut while someone worked on my eyelids. 2) They fell out within a few days. 3) Every time I got my face wet, such as when I was in the shower, my eyes burned!

I decided after my group eyelash extension I needed to do something to help my now broken off eyelashes to grow back ASAP. I found Grande Lash MD, not only did my lashes grow back, they grew back longer and stronger, and they looked amazing, like people stopping me everywhere I went amazing! I bought some for my mom too, she loved it and her lashes grew long and strong too! I have recommended Grande Lash MD to so many friends and strangers I have lost count. I can’t rave enough about it.

So, step 1 to fabulous beautiful long and full eyelashes is get yourself some Grande Lash MD. You can use it twice a day or only at night until you get your desired results and then you can apply once every other day for maintenance. If your eyes get red or you have any irritation, take a day or two off and try again.

As an add bonus, you can apply to eyebrows as well. It helps to grow your over tweezed brows in also! The pictures in this post are of my eyelashes with nothing on them at all.

Grande Lash MD retails for $65 for a tube, about ½ as much as Latisse without all the crazy side effect!

Grow your own eyelashes so you look like you have extensions without the hassle, expense, and massive amount of time needed to maintain extensions!

Stay tuned for more tips and tricks to get the best eyelashes ever!

If you are interested in getting your own Grande Lash MD contact Connie at 702-588-3035 or on Facebook at https://www.facebook.com/BrowsByConnie. This is who I get mine from and I know that it is fresh and directly from the company because she can’t keep it in stock. I’ve read reviews on Amazon where they were sent old product, so be careful!connie

Prime Time!

Who has heard about primers and thought it was a wasted step, time, or money? I’ll be honest, I did, that was until I started using them. Now I am obsessed because it’s the difference between having to touch up my make up later in the day and not having to, and in pictures, forget about! It makes you look so much better. Do you want your pores to look smaller? Primer can do that! Do you want your lashes to look longer? Primer can do that! Do you want your crème shadow to stay put? Primer can do that too!primers 2

My absolute favorite is eyelash primer! They take your lashes from looking ordinary to extraordinary! This one extra easy set makes a huge difference! The trick is to let the primer dry completely before you apply your mascara. Do this and you will see a major difference. My favorite is Lash Food’s primer and then I put the matching mascara over top.
Next, you need an eye shadow primer; this makes your lid all one color before you start applying your shadow. This also helps when you apply crème shadow, it keeps it from creasing. Not to mention that it holds your shadow in place all day long, making touch-ups unnecessary.

Lastly, is the face primer, which gives you an even, pore-less canvas on which to apply your foundation. This gives you a smooth surface and again helps to hold your make-up in place all day.

Also, in a pinch you can rub a little extra foundation on your lids and lips as primer.

Now, I have used expensive primers, but personally this is not where I want to spend my money. No one even knows you’re wearing it! I do splurge slightly on my lash primer at about $20 a tube, but I have found fantastic eye shadow primer that works as well as the more expensive brands by E.L.F. ($3-6) and face primer by NYX High HD Studio Primer ($12ish). These are fabulous primers for a great price. Try primer today and you’ll save time on touch ups. Cause ain’t nobody got time for that! 

http://www.lashfood.com/r/products.php

http://www.amazon.com/l-f-Mineral-Eyeshadow-Primer-NATURAL/dp/B00853EYZQ/ref=sr_1_3?s=beauty&ie=UTF8&qid=1391547452&sr=1-3&keywords=elf+eyeshadow+primer

Cream Eye Shadow… so under rated!

My secret for looking fabulously put together in a small amount of time is cream eye shadow. You can use your fingers!!!!!! You can use a brush!!!!!! You can look amazing in 3 minutes!

14k gold, provoke, runway

14k gold, provoke, runway

I totally get the whole running out the door to activities with your kids, or work, or errands and not wanting to look like a total hot mess! This is my secret for looking put together without all the layers of eye shadow and brushes and clean up! You can use 2-3 crème eye shadows and look amazing, you could use a traditional powder eye shadow and add a crème and look great. It’s all so easy!

I know some of you may be thinking about the creasing. I can take care of that too! It’s called eye shadow primer and you don’t have to break the bank to get a great one! It eliminates creasing sometimes caused by cream eye and helps your eye makeup stay put all day long!

My favorite cream eye shadows are from Fonda Lee’s exclusive makeup line that you can find atcropped creme shadow the Fonda Lee Beauty Bar in Mid-Town in Palm Beach Gardens FL, and if you aren’t local, check out her website at http://fondaleebeauty.com/ . The picture features two of my favorite looks: the right side uses all cream eye shadows that I applied with my fingers- 14k gold on the brow bone, provoke in the crease, and runway on the lower lid. The left eye shows Fonda Lee’s powder shadow crème de la crème with cream shadow provoke in the crease, one of my absolute favorite easy, but together, classic looks!

Stay tuned for my next post to see how to make a big difference in your make up staying power with one easy step.

Happy finger painting! 